| Volkswagen R GmbH, optional equipment, “R Line” and “R” |
 Note
| The removal and installation procedures for the bumper cover
may vary slightly, depending on vehicle model. |
| Special tools and workshop equipment
required |
|
|
|
|
|
|
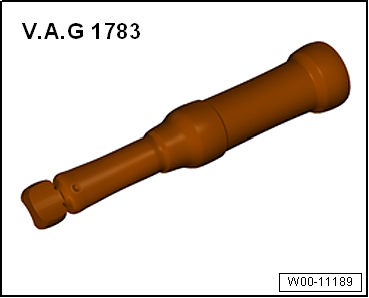
Torque wrench -V.A.G 1783- |
| – |
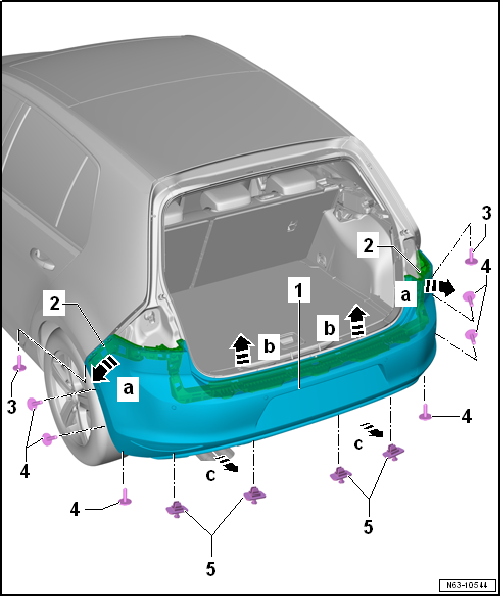
Remove tail lights in side panel
→ Electrical system; Rep. gr.94. |
| – |
Undo bolts -3- in wheel housing
(pointing upwards) on left and right. |
| – |
Remove bolts -4- on left and right
sides in area of wheel housing liner. |
| – |
Remove spreader rivets -5- from
underneath. |
| Further dismantling requires the assistance of a second mechanic. |
| – |
Pull bumper cover -1- out of guide
fasteners on left and right -2- of side
panel -arrows a-. |
| – |
Release bumper cover -1- upwards from
fasteners -arrows b-. |
| – |
Pull bumper cover -1- off vehicle in
parallel movement -arrows c-. |
| – |
Unplug connectors to electrical components (where installed). |
| General information and work instructions for the parking aid can be
found in
→ Electrical system; Rep. gr.94. |
| General information and work instructions for the Park Assist system
can be found in
→ Electrical system; Rep. gr.94. |
| Further installation requires the assistance of a second mechanic. |
| – |
If present, connect connectors of electrical components. |
| – |
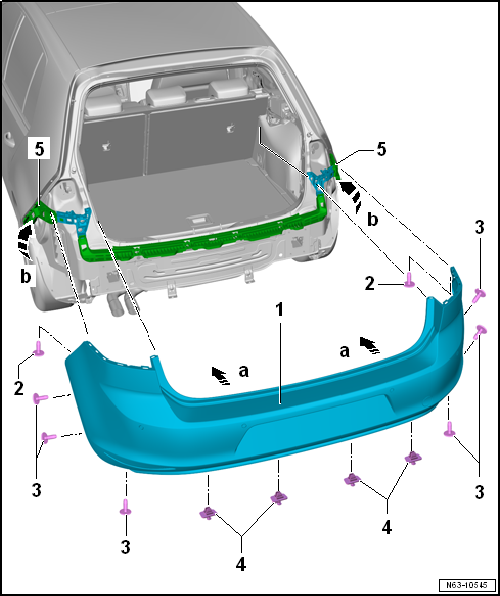
Guide bumper cover -1- onto vehicle in
a parallel movement -arrows a-. |
| – |
Press bumper cover -1- onto guides on
left and right -5- of side panel until they
engage with each other -arrow b-. |
| – |
Observe gaps/shut lines
→ Rep. gr.00. |
| – |
Clip in spreader rivets -4- from
underneath. |
| – |
Install tail lights in side panel
→ Electrical system; Rep. gr.94. |
| – |
Additional work step for models GTI and GTD
→ Anchor. |
| – |
Additional work step for models “R Line” and “R”
→ Chapter |
| |
→ Chapter „Assembly overview - bumper cover“ |
| Removing and installing adapter |
|
|
|
| – |
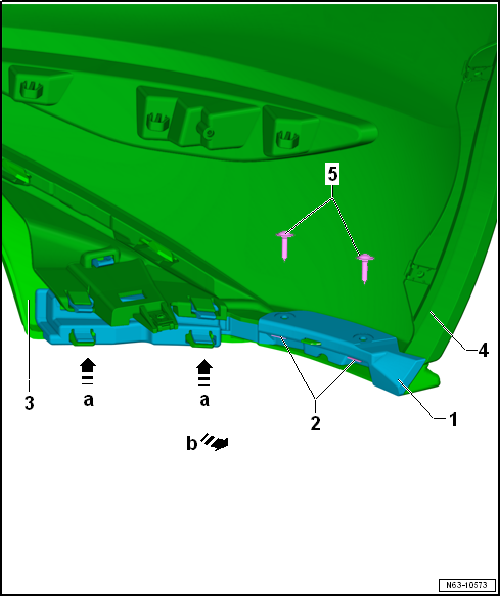
Release fasteners -arrows a-, and pull
adapter -1- off spoiler
-3- and bumper cover
-4--arrow b-. |
| – |
Push adapter -1- onto bumper cover
-4- and engage it in spoiler
-3-. |
| |
Bumper cover GTI/GTD
→ Chapter. |
Questions & answers
Removing and installing bumper cover — Volkswagen Golf Mk7
How do I remove the Golf Mk7 rear bumper cover?
Remove the wheel arch liner edges, undo the lower fasteners, release the clips along the top, disconnect the number plate lights, parking sensors and any camera wiring, and pull the cover rearward.
Do I need to disconnect the Golf Mk7 reversing camera when removing the rear bumper?
Yes, if fitted. The camera connector is behind the bumper cover and must be disconnected before pulling the cover away.
Volkswagen R GmbH, optional equipment, “R Line” and “R”
1 -
Impact bar
Different versions, al ...
Volkswagen R GmbH, optional equipment, “R Line” and “R”
Removing
...


