| Special tools and workshop equipment
required |
|
|
|
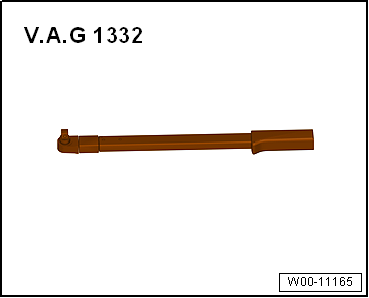
| Torque wrench -V.A.G 1332- |
| – |
Remove spring
→ Chapter. |
|
|
|
| – |
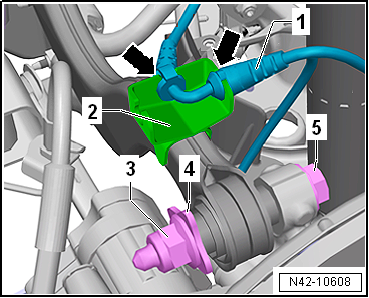
Unhook line -1- from retainer
-2--arrows-. |
| – |
Unscrew nut -3- and remove
washer -4-. |
| – |
Use felt-tip pen or similar to mark position of eccentric
bolt -3- in relation to subframe. |
|
|
|
| – |
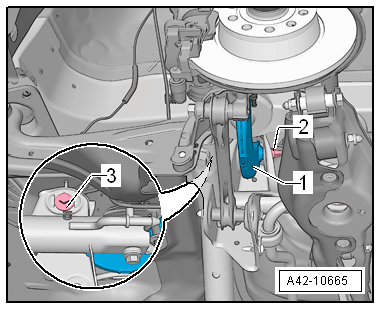
Unscrew nut -2- and pull out
eccentric bolt -3-. |
| – |
Take out upper transverse link -1-. |
| Install in reverse order of removal, observing the
following: |
| The threaded connections of the suspension link may only be
loosened and tightened in the unladen weight position
→ Chapter. |
| – |
Perform wheel alignment
→ Chapter. |
| → Chapter „Assembly overview - transverse link“ |
| → Chapter „Torque settings for wheel bolts“ |
|
|
|
Questions & answers
Removing and installing upper transverse link, front-wheel drive — Volkswagen Golf Mk7
How do I remove the Golf Mk7 FWD rear upper transverse link?
Unbolt from the subframe and wheel bearing housing. Tighten the new link bushes at ride height.
1 -
Subframe
2 -
Bolt
Renew after removing
70 Nm +180°
3 -
Wheel bearing housin ...
Special tools and workshop equipment
required
Torque wrench -V.A.G 1332-
Re ...

 Assembly overview - track rod, multi-link suspension, four-wheel drive
 Removing and installing upper transverse link, four-wheel drive