Using tensioning strap -T10038- and locating pins -T10096-, this page covers removing the Volkswagen Golf Mk7 multi-link rear axle subframe with attachments (FWD, except e-Golf/GTE).
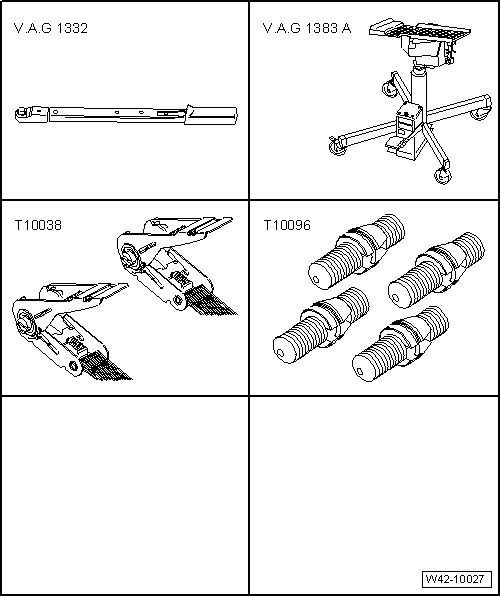
| Special tools and workshop equipment required |
| Torque wrench -V.A.G 1332- |
| Engine and gearbox jack -V.A.G 1383 A- |
| Tensioning strap -T10038- |
| Removing subframe with attachments |
|
|
|
| – |
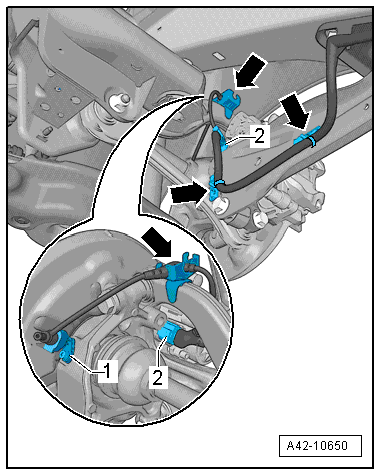
Unplug electrical connector -1-
from ABS speed sensor on both sides and move clear. |
| – |
Unplug electrical connector -2-
from electromechanical parking brake motor on brake caliper on
both sides. |
| – |
Detach electrical wiring harness from retainers
-arrows- and move clear. |
| Vehicles with vehicle level sender |
|
|
|
| – |
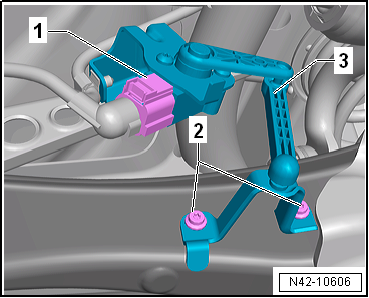
Disconnect connector -1-. |
| – |
Take rear left vehicle level sender -G76--3-
off transverse link. |
| Continuation for all vehicles |
| – |
Remove springs
→ Chapter. |
|
|
|
| – |
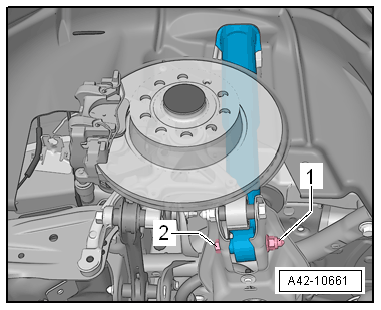
Unscrew nut -1- and remove bolt
-2-. |
|
|
|
| – |
Pull out retaining clip -1- on
both sides of vehicle. |
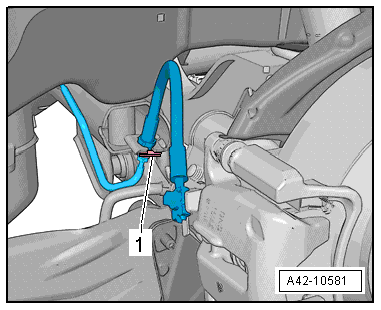
| – |
Free brake lines from holder. |
 Note Note
| – |
Remove brake calipers on both sides and tie to body with
brake lines connected
→ Brake system; Rep. gr.46. |
| – |
Remove rear silencer of exhaust system
→ Rep. gr.26. |
|
|
|
| – |
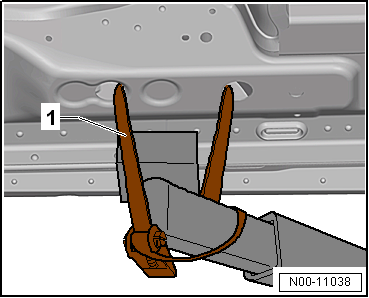
Use tensioning straps -T10038--1-
to strap vehicle to support beams of lifting platform on both
sides. |
 WARNING
| If the vehicle is not strapped down, there is a
great danger that the vehicle will slip off the lifting
platform! |
|
| – |
Fix position of subframe
→ Chapter. |
|
|
|
| – |
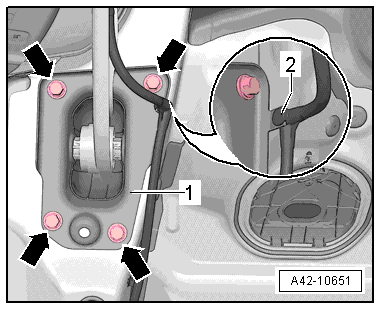
Unclip electrical wire -2- on
mounting bracket -1- and move
clear. |
| – |
Mark installation position of mounting bracket
-1- on body. |
| – |
Carefully lower subframe with attachments a maximum of 30
mm. |
|
|
|
| – |
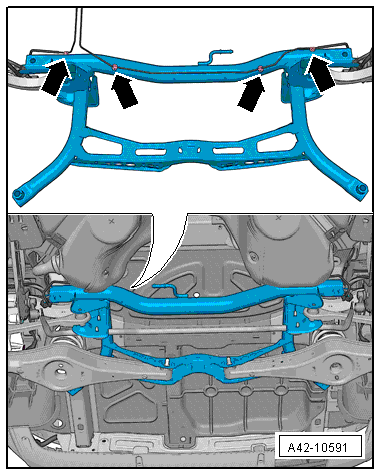
Unclip brake line from clips -arrows-. |
Note
| The clips will be destroyed and must be renewed. |
| For reasons of clarity, the illustration shows the subframe
from above in removed state. |
| – |
Lower subframe with attachments. |
Note
| When lowering, ensure sufficient clearance to brake lines
and electrical wiring. |
| Installing subframe with attachments |
| Install in reverse order of removal, observing the
following: |
| → Chapter „Assembly overview - trailing arm“ |
| → Chapter „Assembly overview - suspension strut, shock absorber,
spring, multi-link suspension“ |
| → Chapter „Assembly overview - rear vehicle level senders,
multi-link suspension, front-wheel drive“ |
| → Chapter „Torque settings for wheel bolts“ |
| Bolts for brake caliper and brake disc
→ Brake system; Rep. gr.46 |
| Exhaust pipes double clamp
→ Rep. gr.26. |
| On vehicles with vehicle level sender, carry out basic
settings for wheel damper electronics → Vehicle
diagnostic tester |
| On vehicles with vehicle level sender, carry out basic
adjustment of headlights
→ Electrical system; Rep. gr.94. |
| – |
When does wheel alignment have to be checked
→ Chapter? |
|
|
|
Questions & answers
Removing and installing rear axle, multi-link suspension, front-wheel drive, except for e-Golf and Golf GTE — Volkswagen Golf Mk7
How do I remove the Golf Mk7 FWD rear multi-link axle?
Lower the subframe first, then disconnect all links, track rods and trailing arms from the wheel bearing housing and remove the assembly.
Special tools and workshop equipment
required
Torque wrench -V.A.G 1332-
...
Special tools and workshop equipment required
Torque wrench -V.A.G 1332-
Engine and gearbox jack -V.A.G 1383 A-
Tensioning strap -T10038 ...


