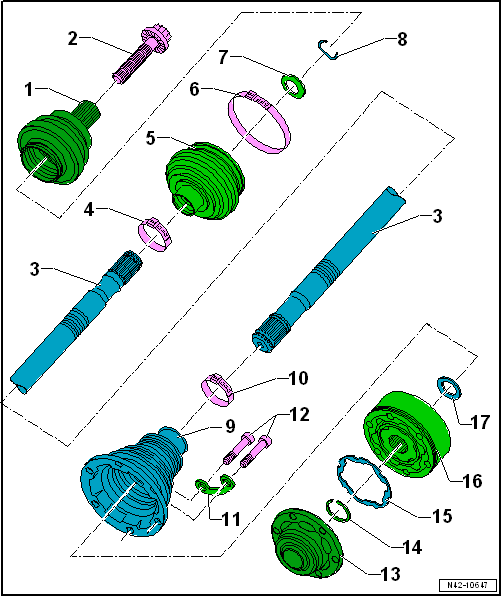
| 1 - |
Outer constant velocity joint |
| Renew only as complete unit |
| Installing: drive onto shaft to stop using plastic hammer |
| Distribute grease evenly in joint |
| Before fitting, clean the threads in the CV joint using a thread
tap. |
| Allocation
→ Electronic Parts Catalogue. |
| Check for splits and chafing |
| Material: Hytrel (polyester elastomer) |
| Installation position
→ Fig. |
| Insert in groove in shaft |
| 9 - |
Boot for constant velocity joint |
| Material: Hytrel (polyester elastomer) |
| Check for splits and chafing |
| Drive off constant velocity joint with a drift |
| Coat sealing surface of constant velocity joint with -D 454 300 A2-
before installing. |
| 12 - |
Multi-point socket head bolt |
| Initially tighten diagonally to 10 Nm and then tighten diagonally to
specified torque. |
| Remove and install with circlip pliers -VW 161 A-. |
| Adhesive surface on constant velocity joint must be free of oil and
grease! |
| 16 - |
Inner constant velocity joint |
| Renew only as complete unit |
| Distribute grease evenly in joint |
| Installation position
→ Fig. |
Questions & answers
Assembly overview - drive shaft — Volkswagen Golf Mk7
What does the Golf Mk7 rear drive shaft assembly show?
Inner and outer CV joints, boot clamps, shaft, hub nut and flange bolts to the rear differential.
Special tools and workshop equipment
required
Torque wrench -V.A.G 1332-
...


