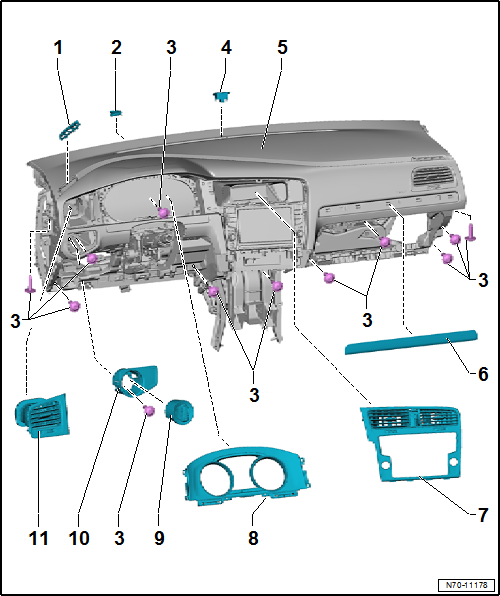
- Left and right
- Removing and installing
→ Chapter
- Qty. 2
- Slide onto dash panel mountings on lower windscreen frame
| 4 - |
Sunlight penetration photosensor -G107- |
- Removing and installing
→ Heating, air conditioning; Rep. gr.87
- Removing and installing
→ Chapter
| 6 - |
Trim panel for dash panel |
- Allocation
→ Electronic Parts Catalogue
- Removing and installing
→ Chapter
| 7 - |
Centre vent with trim for display unit for front information display
and operating unit control unit -J685- |
 Note
Note
| Always remove trim for display unit for front information display
and operating unit control unit -J685- and centre vent together as one
unit. |
- Removing and installing
→ Chapter
| 8 - |
Dash panel insert trim |
- Removing and installing
→ Chapter
| 9 - |
Rotary light switch -EX1- |
- Removing and installing
→ Electrical system; Rep. gr.96
- Removing and installing
→ Chapter
- Left and right
- Removing and installing
→ Chapter
Questions & answers
Assembly overview - dash panel — Volkswagen Golf Mk7
What does the Golf Mk7 dash panel assembly show?
Side defroster vents, rubber buffers, mounting bolts, nuts and torque values for the full dash panel structure.
Note
Removal and installation is described for the dash panel
end cover on driver side. Follow same instructions for the front
passenger side as approp ...


