Using thrust plates -VW 401-/-VW 402-, press tool -VW 408 A-, support sleeve -VW 522-, tensioner -40-204 A- and special pliers -V.A.G 1682-, this page covers dismantling the VL107 drive shaft joint.
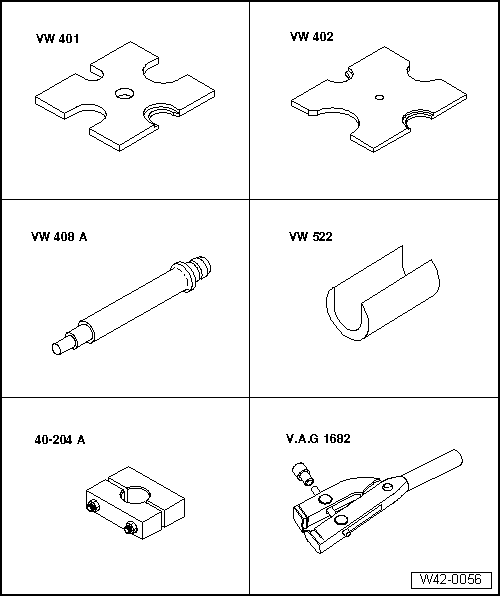
| Special tools and workshop equipment required |
| Special pliers -V.A.G 1682- |
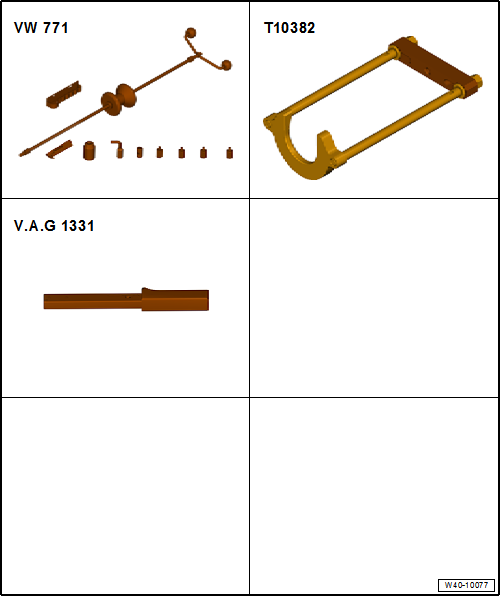
| Multi-purpose tool -VW 771- |
| Torque wrench -V.A.G 1331- |
| Removing outer constant velocity
joint |
| – |
Clamp drive shaft in vice using protective jaw covers. |
| – |
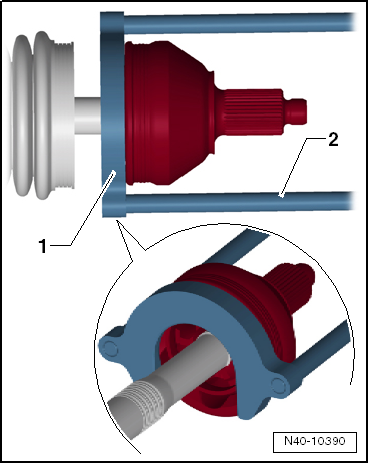
Set puller -T10382- up so that smooth side of puller plate
-T10382/1- points to spindles -T10382/2-. |
| – |
Assemble puller -T10382- complete with multi-purpose tool -VW
771-. |
|
|
|
| – |
Pull constant velocity joint from drive shaft with puller
-T10382- and multi-purpose tool -VW 771-. |
| 1 - |
Puller plate -T10382/1- |
| Driving on outer constant velocity joint |
| – |
Install new retaining ring. |
| – |
If necessary, push new joint boot onto drive shaft. |
| – |
Knock onto shaft with plastic hammer until circlip engages. |
|
|
|
| Driving off cover for inner joint |
| – |
Remove both clamps and slide boot towards outer joint. |
| – |
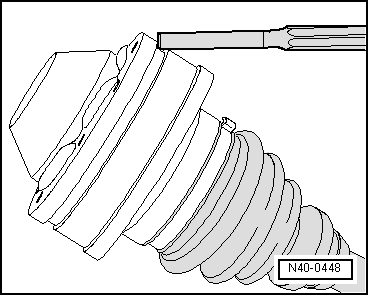
Drive off joint boot with a drift. |
|
|
|
| Pressing off inner constant velocity joint |
|
|
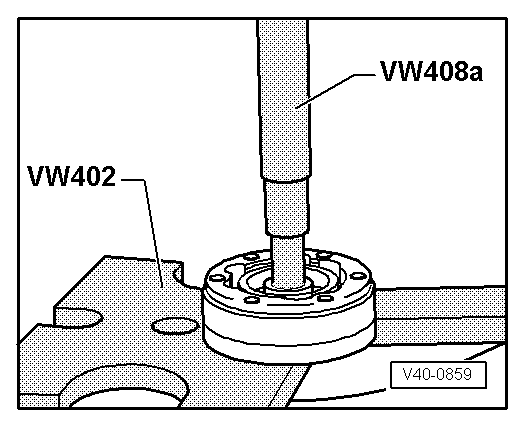
|
| Pressing on inner constant velocity joint |
| – |
Press joint on to stop. |
| – |
Install retaining ring. |
|
|
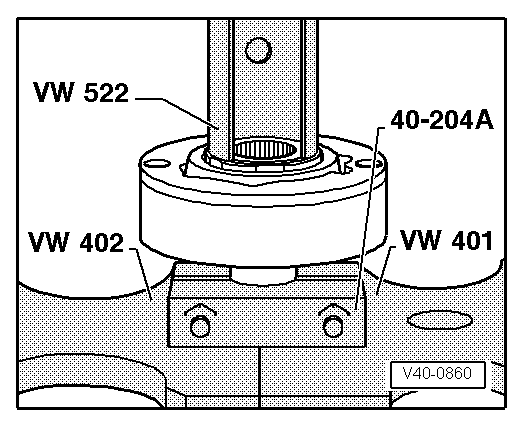
|
| – |
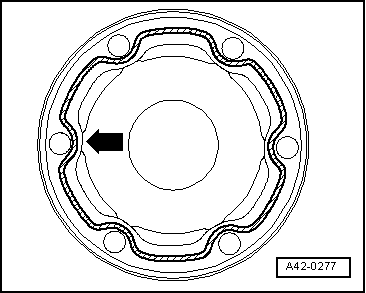
Coat sealing surface of cover with -D 454 300 A2-.
|
| – |
Apply a continuous bead of sealant with a diameter of 2 ...
3 mm to clean surface of cover in area of inner holes
-arrow-. |
|
|
|
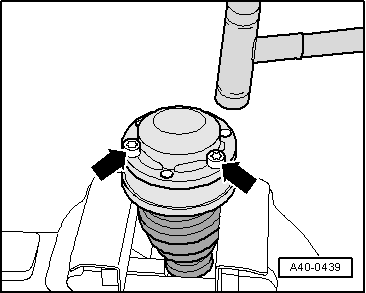
| – |
Using bolts -arrows-, align new
cover in relation to bolt holes. |
| The alignment must be very accurate, because no further
alignment is possible once the part has been hammered on. |
| – |
Drive on cover using a plastic hammer. |
| – |
Wipe off surplus sealant. |
|
|
|
| Tighten clamp on outer joint |
| – |
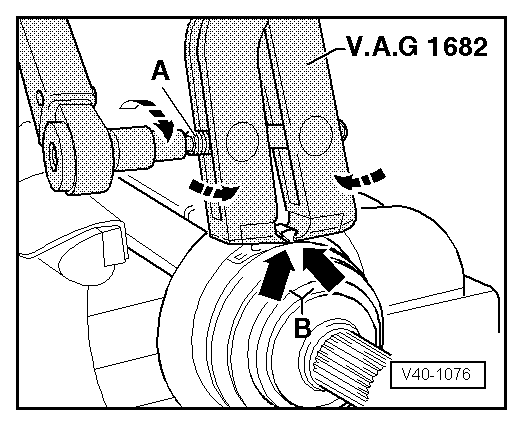
Apply special pliers-V.A.G 1682-
as shown in diagram. Ensure jaws of tensioner lie in corners
-arrows B- of ear on O-type clip. |
| – |
Tighten clamp by turning spindle with a torque wrench (do
not cant pliers).
|
 Note Note
| Due to the hard material of the protective boot (compared to
rubber) and the necessity of using a stainless steel clamp, it
is only possible to tension the clamp with clamp tensioner -V.A.G
1682-. |
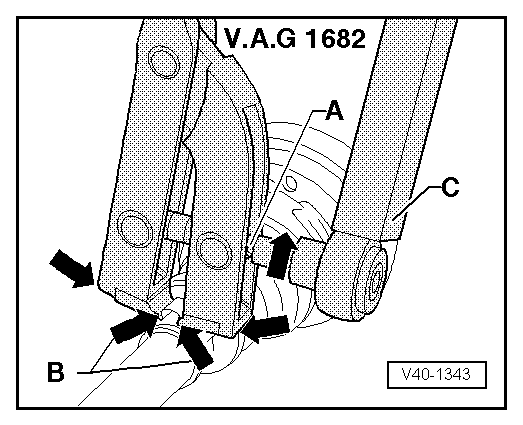
| Use torque wrench -C - with
setting range of 5 ... 50 Nm (e.g. torque -V.A.G 1331-). |
| Make sure thread of spindle -A-
on pliers moves freely. Lubricate with MoS2 grease if necessary. |
| If the thread is tight (e.g. due to dirt), the required
clamping force for the clamp will not be attained although the
specified tightening torque is applied. |
|
|
|
| Tightening clamp on small diameter |
| Checking outer constant velocity joint
→ Chapter |
| Checking inner constant velocity joint
→ Chapter |
| Checking function of constant velocity joint
→ Anchor |
|
|
 |
Questions & answers
Dismantling and assembling drive shaft, constant velocity joint VL107 — Volkswagen Golf Mk7
How do I dismantle a Golf Mk7 VL107 CV joint?
Same procedure as VL100 but the joint is larger. Use the correct grease quantity from the kit.
Special tools and workshop equipment required
Thrust plate -VW 401-
Thrust plate -VW 402-
Press tool -VW 408 A-
Press t ...
Special tools and workshop equipment required
Thrust plate -VW 401-
Thrust plate -VW 402-
Press tool -VW 408 A-
...

 Dismantling and assembling drive shaft, constant velocity joint VL100
 Dismantling and assembling drive shaft, triple roller joint AAR3300i