Shown for a left-hand drive vehicle (identical for both sides), this page covers removing the Volkswagen Golf Mk7 rear footwell vent — remove the sill panel moulding first.
 Note Note
| The illustration shows a left-hand drive vehicle. The
removal and installation procedure is identical for both sides. |
| – |
Remove the sill panel moulding
→ General body repairs, interior; Rep. gr.70. |
| – |
Remove the front seat
→ General body repairs, interior; Rep. gr.72. |
| – |
Remove centre console
→ General body repairs, interior; Rep. gr.68. |
| – |
Lift the floor covering in the area of the vent. |
|
|
|
| – |
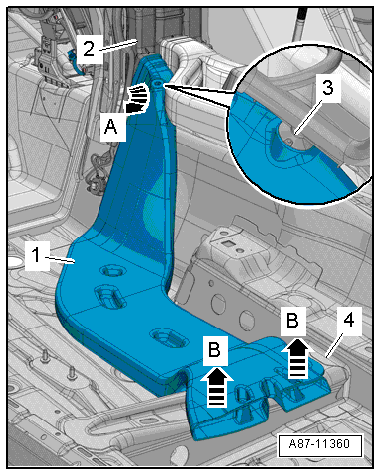
Prise off the cable clip -3-. |
| – |
Lift up the rear footwell vent
-1--arrows B-, detach from the heater and air
conditioning unit -2--arrow A- and
take out to the side. |
|
|
|
| Installation is carried out in the reverse order. When
installing, note the following: |
| – |
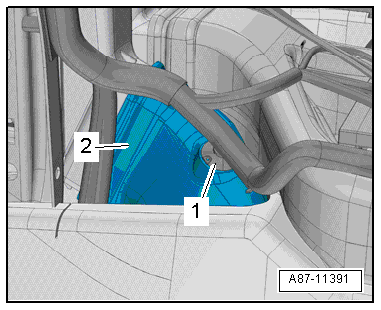
Check the cable clip -1- for
damage before pressing on at the footwell vent
-2-. |
Note
| A loose cable clip or damaged seal can lead to flow noise. |
|
|
|
Questions & answers
Removing and installing rear footwell vent — Volkswagen Golf Mk7
How do I remove the Golf Mk7 rear footwell vent?
LHD shown; RHD identical. Unclip from the rear of the centre console.
Removing
Pyrotechnic components may trigger unintentionally.Risk of
injury.Discharge any static charge accumulated in your body by briefly
touching striker pl ...
Note
The illustration shows a left-hand drive vehicle.
Removing
–
Remove centre console
→&n ...


